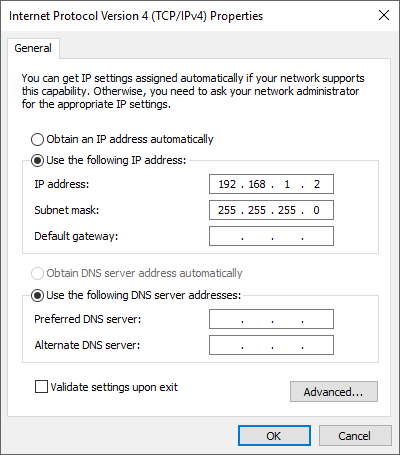
Set the NIC to static IP of 192.168.1.1
Connect the ethernet cable to any port
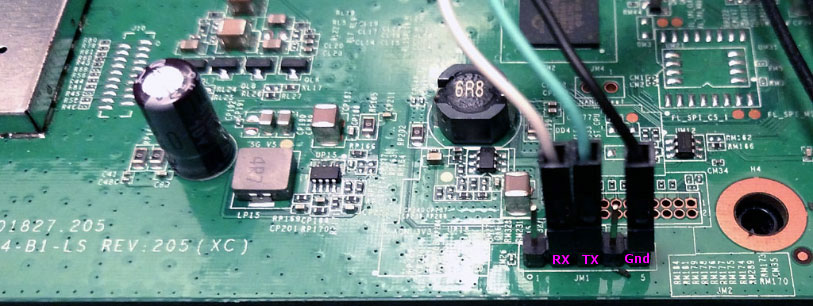
Connect USB/TTL cable as shown:
All you need to install dd-wrt on your EA8500 can be found in this .zip file (22.6 MB) ‘PuTTy-TFTP.zip’.
zip file includes:
putty.exe
tftpd32.exe
EA8500-factory-to-ddwrt.img
EUPL-EN.pdf
tftpd32.chm
- tftpd32.ini
Unzip and place the PuTTy-TFTP folder. Leave all files intact.
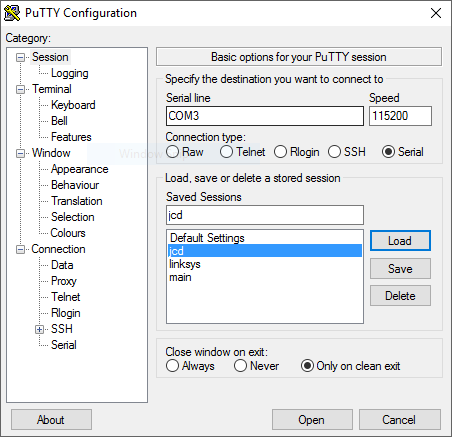
In the PuTTy-TFTP directory open putty.exe and setup as pic shows.
(make sure your COM number matches what you seen in device management)
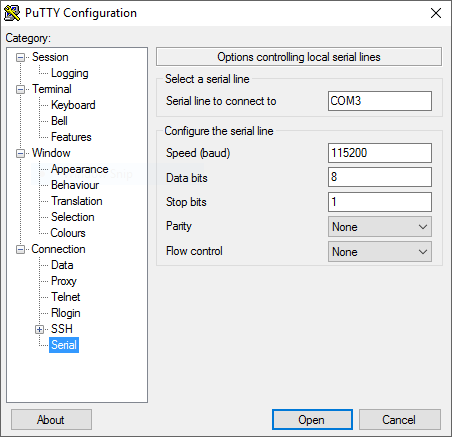
You can name & save these settings if you want
Click the Open button and you should see
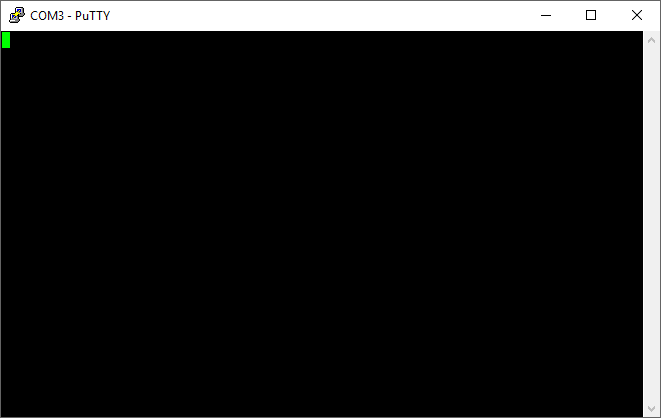
Click on the power button of the EA8500 and within approx 1 second hit the ENTER key.
Within few seconds you should get (IPQ) # prompt
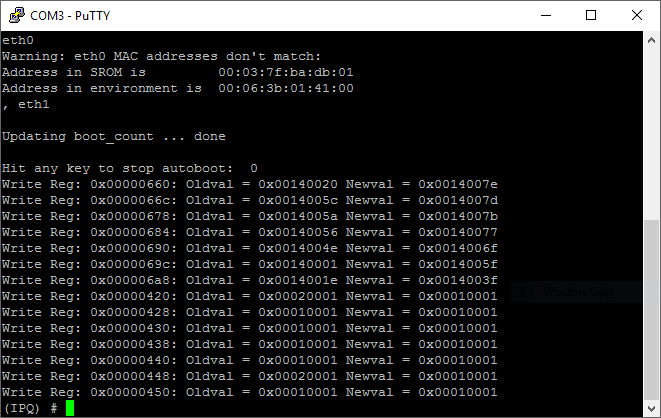
Just leave it there while we setup the TFTP server.
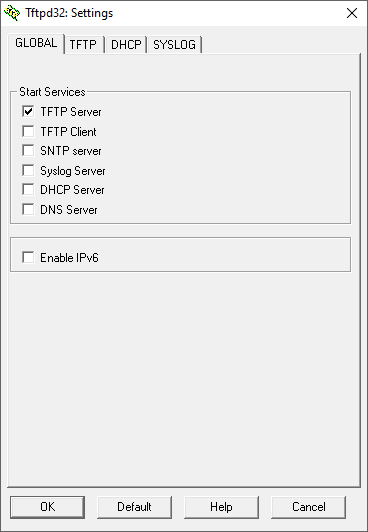
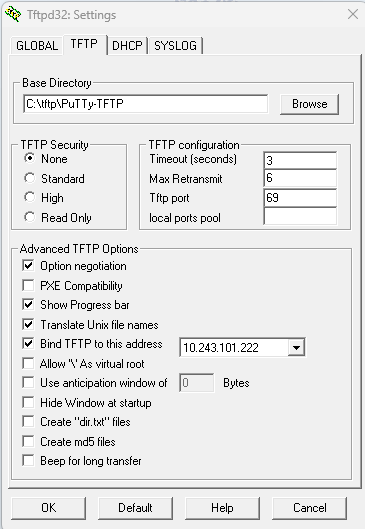
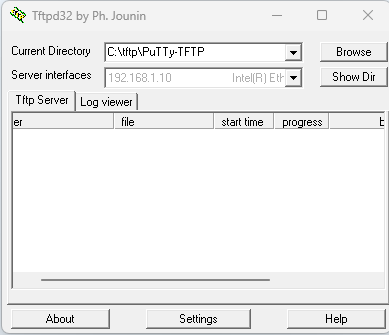
In the PuTTy-TFTP directory open tftpd32.exe and setup as pics show –
You need to run as administrator so right click the app to open – run as admin.
Just leave it there while we setup the TFTP server.
In the PuTTy-TFTP directory open tftpd32.exe and setup as pics show –
You need to run as administrator so right click the app to open – run as admin.
Copy the text below: ( paste it in some ‘plaintext’ file somewhere would be handy )
setenv image EA8500-factory-to-ddwrt.img
setenv ipaddr 192.168.1.1
setenv serverip 192.168.1.2
run flashimg
Bring PuTTy window to forefront and paste the above text in. ( a right click with the ol' mouse will paste in putty )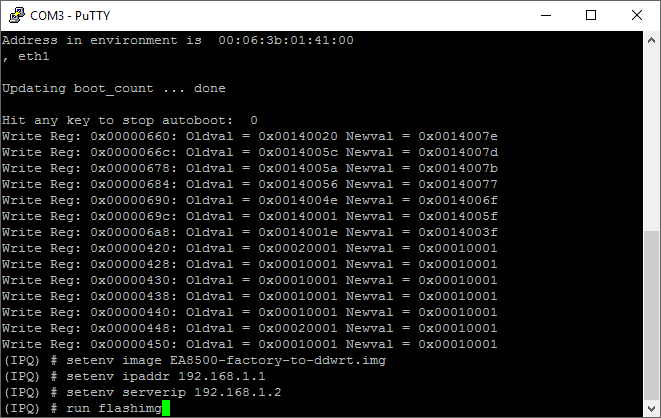
Hit ENTER
After you see the (IPQ) #
We are going to flash the other partition ~
Copy the text below: ( Paste into PuTTy as we did before )
setenv image EA8500-factory-to-ddwrt.img
setenv ipaddr 192.168.1.1
setenv serverip 192.168.1.2
run flashimg2
Hit ENTER
this is what PuTTy window should show
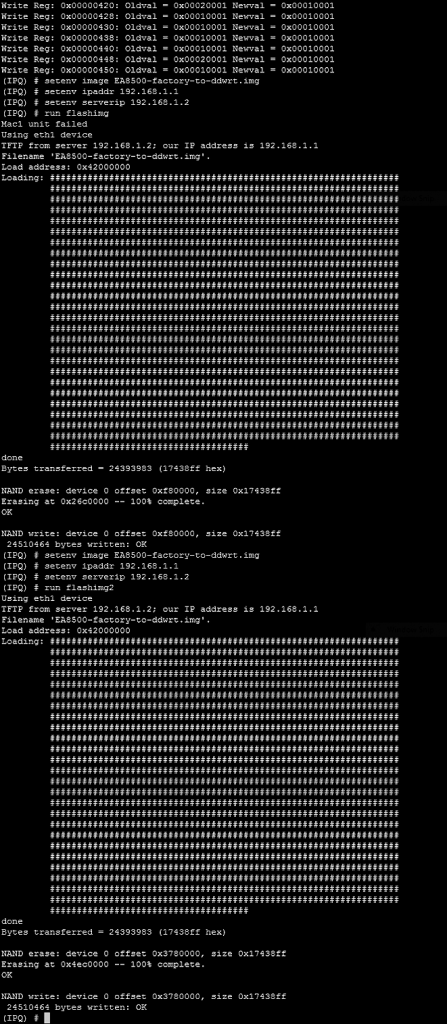
After both images are flashed and PuTTy comes back with (IPQ) # type in:
reset
Hit ENTER
Yay !!!
You can now close out Tftpd32 & PuTTy & unplug USB/TTL
When router is fully booted — usually dont take about a minute,
you can launch your browser and go to 192.168.1.1 and be greeted with